How to save the layout in SAP?

How to save the layout in SAP?
Tailoring the interface to your needs not only makes SAP more convenient to use, it also increases productivity. Configure the appearance of the system to use it even more efficiently than before. Wondering how to save the layout in SAP? This article will give you the answer. All you need to do is follow the instructions below.

Problem

How can I change the layout in SAP?

Step-by-step SAP instructions

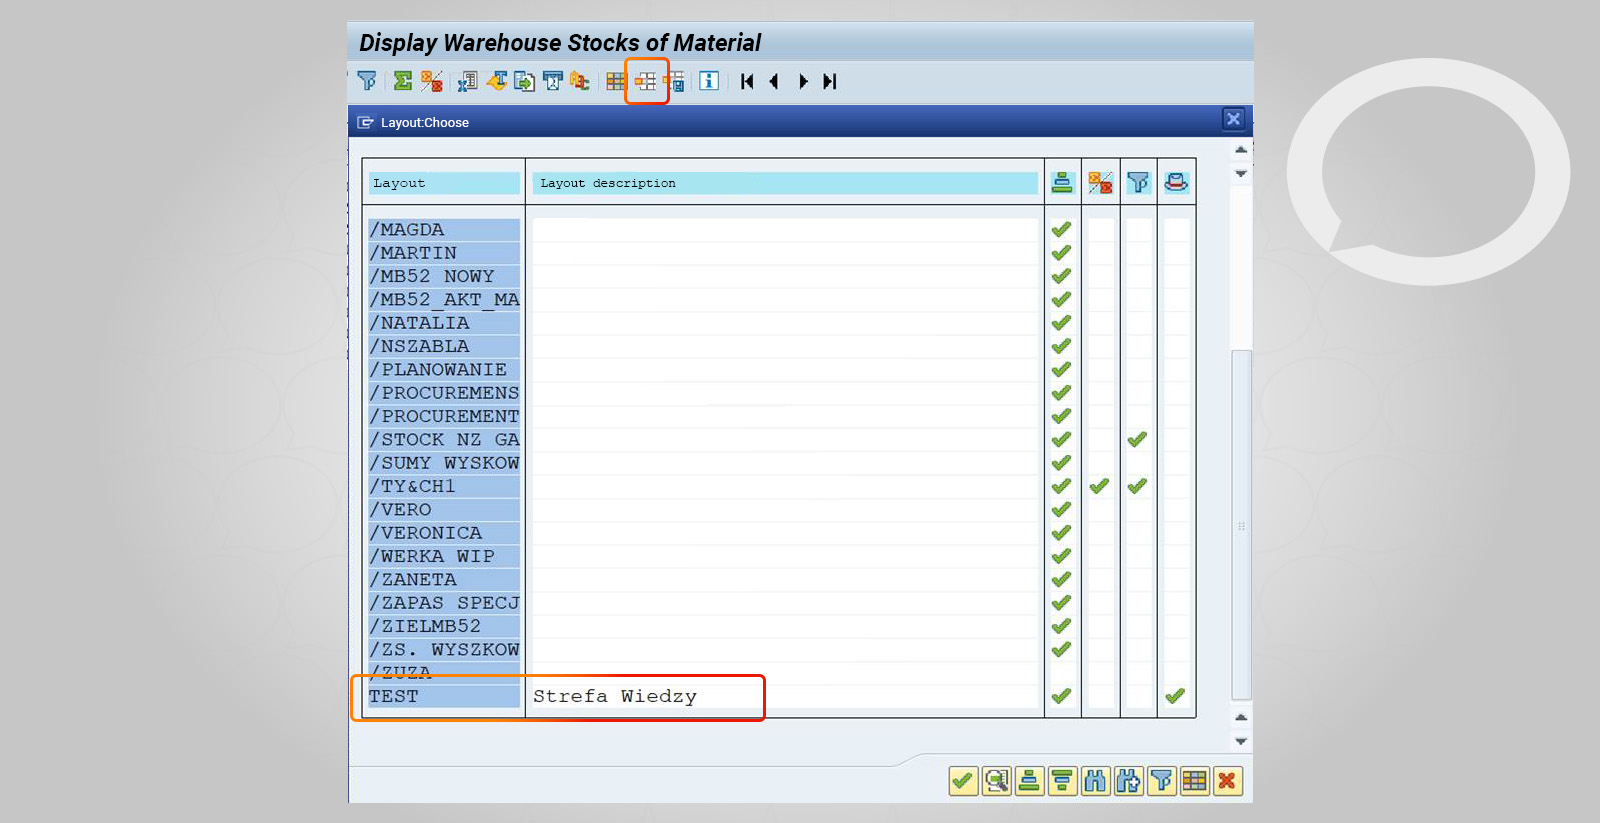
1. In SAP, the layout can be changed after executing the transaction by clicking on the Change Layout icon    or the Select Layout icon  .

2.The system will display a screen divided into two areas.

  • The first area shows the columns that will be displayed after executing the transaction.
  • The second area shows hidden columns that are available for display.

Select individual hidden columns from the right area and use the arrow    to move them to the area containing the columns to be displayed in the report. You can also move all columns by clicking   .

3. After creating the layout, you can save the settings.

4. The next time you use the report, you can select a previously created layout. The system will display the data using the saved settings.
Have a question? We know the answer!

Use Know-How materials and learn more about the benefits of AMS! Leave your contact details with application support specialists.

Now that you know how to save a layout in SAP, it’s time to put that knowledge into practice. Customize the system’s interface and save your changes. This will make your daily work easier and more comfortable. If you have any questions, don’t hesitate to contact your Hicron consultant. They will be happy to share their knowledge and experience with you, providing support in adjusting not only the system’s appearance but also its functionality. Simply reach out by email or phone.

This site use cookies. By continuing to use this website, you agree to our Privacy Policy.

OK, I agree